Expert Painting Tips for a Stunning Finish
A beautifully painted wall can dramatically transform any space, whether it’s a living room, kitchen, or office. However, achieving that flawless, professional finish requires more than just slapping paint on a surface. From the preparation process to choosing the right tools, here are expert painting tips to help you get a stunning result every time.

1. Preparation is Key
One of the biggest mistakes DIY painters make is not preparing the surface adequately. A perfectly smooth and clean surface is the foundation for a smooth paint finish. Here’s how to prepare your surface like a pro:

- Clean the Walls: Dust, dirt, and grease can affect the paint’s adhesion. Use a damp cloth or sponge to wipe down the walls, especially in kitchens or bathrooms where grease and moisture can accumulate.
- Repair Imperfections: Before you begin, repair any cracks, holes, or dents. Use spackling paste or joint compound for small imperfections and sand the areas down once they dry. Larger holes may need drywall patches.
- Sanding: Sanding is crucial for removing uneven textures and old paint drips. For glossy surfaces, lightly sand to create a texture for the new paint to stick to. Always wipe down the dust after sanding.
- Primer Application: Don’t skip primer, especially if you’re painting a light color over a dark one or covering stains. Primer creates a smooth, consistent surface for the paint to adhere to and helps hide imperfections.

2. Choosing the Right Paint
Not all paints are created equal, and choosing the right one for your project is essential for a beautiful finish. Consider the following when selecting paint:
- Sheen Matters: The paint finish can significantly affect the look and durability. Matte or flat paints are great for hiding imperfections, while satin, eggshell, and semi-gloss finishes are easier to clean and more durable for high-traffic areas. Glossy finishes are perfect for trim or doors.
- Color Selection: Test the color on a small section of the wall before committing. Paint colors can look different depending on the lighting and the surrounding décor. Keep in mind that darker colors may require more coats, while lighter colors can open up the space.
- Quality Over Quantity: Opt for high-quality paint even if it’s more expensive. Better quality paint covers more efficiently and lasts longer. This can save time and money in the long run since fewer coats are required, and the finish is more durable.
3. Invest in High-Quality Tools
Using the right tools is crucial for achieving a professional finish. Avoid cheap brushes and rollers, as they can leave streaks, shed bristles, or cause uneven coverage. Here’s what you’ll need:
- Brushes: High-quality, angled brushes are great for “cutting in” along edges and corners. For trim work, use small, flat brushes that can help create sharp lines.
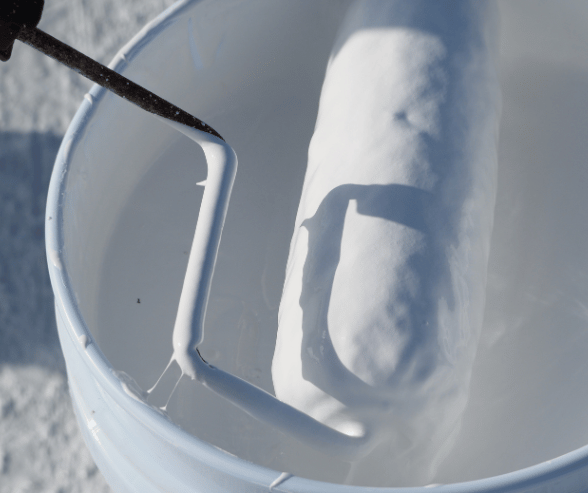
- Rollers: Rollers are ideal for covering large areas quickly. Use a short-nap roller for smooth surfaces and a longer-nap roller for textured surfaces like brick or stucco. Always select a roller based on the type of paint you’re using.
- Painter’s Tape: Use painter’s tape to protect areas like trim, windows, or baseboards. Make sure to remove the tape while the paint is still slightly wet to avoid pulling away the dried paint.
- Paint Trays and Grids: A high-quality paint tray and a grid for your roller help distribute the paint evenly across the roller, preventing excess paint and drips.

4. Mastering Painting Techniques
Proper technique is essential for a smooth and professional finish. Whether using a brush or roller, here are some tips to ensure consistent coverage:
- Cutting In: Start by cutting in the edges with a brush before you begin rolling. Cutting in means painting the areas along the ceiling, corners, and trim where the roller can’t reach. This creates a border for the roller to blend into.
- The “W” Technique: When using a roller, don’t just roll vertically. Apply the paint in a “W” or zigzag pattern, then fill in the gaps. This helps distribute the paint evenly and prevents streaking or roller marks.
- Feathering the Edges: To avoid lap marks, feather the edges of your brush strokes or roller passes. This technique helps blend one section into the next for a seamless finish.
- Watch Your Paint Load: Avoid overloading your brush or roller. Too much paint can lead to drips and uneven texture. Instead, apply multiple thin coats for a smoother finish.
5. Multiple Coats for Maximum Impact
One coat of paint is rarely enough to achieve full coverage, especially with darker colors. Here’s why applying multiple coats is essential:

- Even Coverage: The first coat may appear uneven, with the previous color showing through in spots. The second (and sometimes third) coat helps ensure full, even coverage across the surface.
- Increased Durability: Multiple coats of paint create a stronger, more durable finish. This is particularly important for high-traffic areas like hallways or kitchens.
- Allow for Drying Time: Let each coat dry completely before applying the next. Rushing this step can lead to streaks, bubbling, or peeling. Follow the manufacturer’s recommended drying times.
6. Pay Attention to Trim and Details
Trim, baseboards, and doors are often overlooked, but a polished paint job requires attention to these details. Here’s how to handle trim like a pro:
- Use Glossy Paint: For trim and molding, use a glossy or semi-gloss finish that stands out against the matte or satin walls. Glossy finishes are easier to clean and more resistant to scuffs and fingerprints.
- Steady Hand or Tape: If you have a steady hand, you can cut in the trim without tape. However, using painter’s tape can help you achieve sharp, clean lines, especially around intricate areas.
- Thin, Even Coats: Trim tends to show brush marks more easily, so apply thin coats and use a high-quality brush. Sand lightly between coats for an ultra-smooth finish.

7. Finishing Touches and Cleanup
After painting, it’s essential to finish the job properly to maintain a professional look:
- Inspect for Missed Spots: After the paint dries, check for areas that may need touch-ups. Use a small brush to fix any missed spots, streaks, or uneven areas.
- Remove Painter’s Tape Carefully: Once the paint is dry to the touch, carefully remove the painter’s tape. Pull the tape away from the wall at a 45-degree angle to avoid lifting the paint.
- Clean Your Tools: Clean brushes, rollers, and trays immediately after finishing. For water-based paints, wash tools with soap and water. For oil-based paints, use mineral spirits or paint thinner.
8. Common Mistakes to Avoid
Even with the best tools and techniques, certain mistakes can lead to less-than-perfect results. Here’s what to avoid:
- Skipping the Primer: Skipping the primer can result in uneven coverage and poor adhesion. Always prime, especially when painting over dark colors or new surfaces.
- Not Allowing Enough Drying Time: Be patient and let each coat dry fully before applying the next. Rushing this step can cause the paint to smudge, peel, or develop bubbles.
- Overloading the Brush or Roller: Using too much paint at once can lead to drips, runs, and uneven texture. Apply thin, even coats and work in sections.
Achieving a stunning, professional-grade finish requires attention to detail, the right tools, and proper techniques. By following these expert painting tips—preparing the surface, selecting the right paint and tools, mastering your technique, and avoiding common pitfalls—you can transform your space into a beautifully painted masterpiece. Whether it’s your first painting project or your tenth, these strategies will ensure a flawless result every time.